Updated on: 25/03/2020
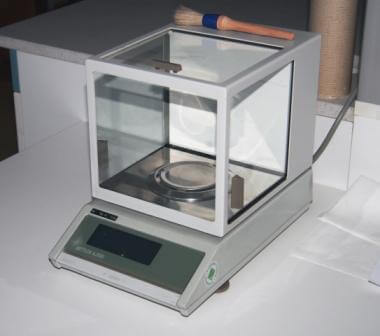
Industry standards such as ISO 9000, give their vote of approval to external certified calibration mass for the calibration of balances and scales. Even though many balances that include internal motorized calibration are available in the market, they can be extremely costly, and will still need external calibration for ISO certification.
To avoid extra expense, it makes sense to use external calibration methods. Removal of the internal calibration mass for calibration can be cumbersome and expensive. Balances can be calibrated by a licensed scale service provider onsite using ISO compliance certified traceable weights. Consider having all of your analytical balances calibrated on one day to avoid multiple visits from your scale service provider. This method can simplify your balance calibration schedule and minimize multiple service charges.

Why to Calibrate Analytical Balances and Scales?
It is said that every location in the world is positioned differently in relation to magnetic “North”, making the acceleration of gravity different from location to location. These factors affect the performance of analytical balances, as do other factors such as ambient temperature and humidity at the installation site, barometric pressure, altitude, etc.
Manufacturers and vendors cannot provide a certificate of calibration for analytical scales and balances on purchase, since this certification can only be given at the place of installation. Since balances are calibrated for the purpose of delivering highly precise measurements, the procedure needs to be conducted at the site where the scale or balance will be installed.
You will be able to get a certificate at the time of calibration from your licensed scale service provider.
Types of Calibration
- External Calibration: External calibration is a manual process that requires the user to place an approved set of weighing scale weights on the balance and set their weight as the standard.
- Internal Calibration: Internal calibration doesn’t require manual efforts. It allows the weighing scale or balance to calibrate itself from time to time. Some scales can also be calibrated with a single click of a button.
Steps for Internal Calibration of Analytical Balances
- Take notes of the instructions provided in the manufacturer’s manual for the internal calibration process.
- Switch on the scale, allow it to warm up and then press the button or key for “auto-calibrate” or “calibrate”.
- Most internal calibrations will first display a “no weight” measurement, and then require a specified standard check weight to be placed on them.
- After placing the weights, verify the use range of the balance.
Steps for External Calibration of Analytical Balances
- Place the scale in an area where the temperature is stable. Make sure that there are no vibrations or detectable air currents.
- On your indicator, open up the ‘Set Up’ menu to enter the test weight value.
- For the calibration process, use a weight that is 50% of the scale’s capacity for accurate calibration. Weights less than 10% can result in inaccuracy.
- Make sure that the scale doesn’t have any weights placed on it and nothing is rubbing against the scale or the platform.
- Press the ‘calibrate’ button.
- The test weight must be placed on the Platform Ð and the calibration weight on the platform’s center. Wait for a couple of seconds before pressing enter. On the top left number, you will notice the raw reading from the load cell. This will increase as the weight on the platform increases. Once the calibration is done, the scale indicator will return the platform menu.
External calibration checks for three factors:
- Drift: A 10 mg standard weight is normally used in order to carry out the drift check. Record ten measurements made with the 10 mg weight in a performance check log in order to observe any variations in results. The observed variation, or “drift” of each measurement should not exceed the mean value by more than ± 0.2 mg.To meet the check criteria for all the ten measurements of the 10 mg weight, the mass value cannot under any circumstances vary above 0.01 mg, making the criteria of actual mass value 0.1%.
- Performance Check: 1 mg, 2 mg, 5 mg, 10 mg and 20 mg calibration standard weights should be placed separately on the top pan balance after the auto calibration process, and the measurements noted in the performance check log. To meet the traceable standard, these measurements need to remain within the 0.1% of the actual mass value of each weight.
- Measurement Uncertainty: To carry out the measurement uncertainty check, place 10 mg external weights on the balance pan and note ten measurements for these. Then, carry out necessary calculations to deduce the measurement uncertainty by multiplying standard deviation by 3, and dividing that by the actual mass value. To meet the check criteria for this stage, the measurement of uncertainty should not exceed 0.001.The maximum loading range of each balance is supplied by the manufacturer, and these checks should be conducted so they cover the entire loading range, from lower to higher limits.
How Frequently Should External Calibration Be Conducted?
Calibration procedure should be performed on a regular schedule for best results, as well as after installation, maintenance, relocation or when a balance seems to be not working properly. If there are any significant changes in operating conditions such as temperature and humidity, it’s also good idea to re-calibrate your equipment before using it. Your scale service provider will always use certified check weights and follow the manufacturer’s instructions for your specific balance.
At Quality Scales Unlimited, expert technicians are available round the clock to install, calibrate and maintain your electronic or mechanical weighing equipment. Call 800.722.5301 or drop your queries for emergency service.


